

QUICK START GUIDE
GOT YOUR SENSORS, WRAPS & ETC?
We have a step-by-step guide below to getting started with your Sensors and the App. It is divided into sections… each with short tutorial video clips, and a written guide with pictures.

1
IN THE BOX
1. Whats In The Box
0:58


INCLUDED
USB charging cable is included in the small gray box labeled accessories.

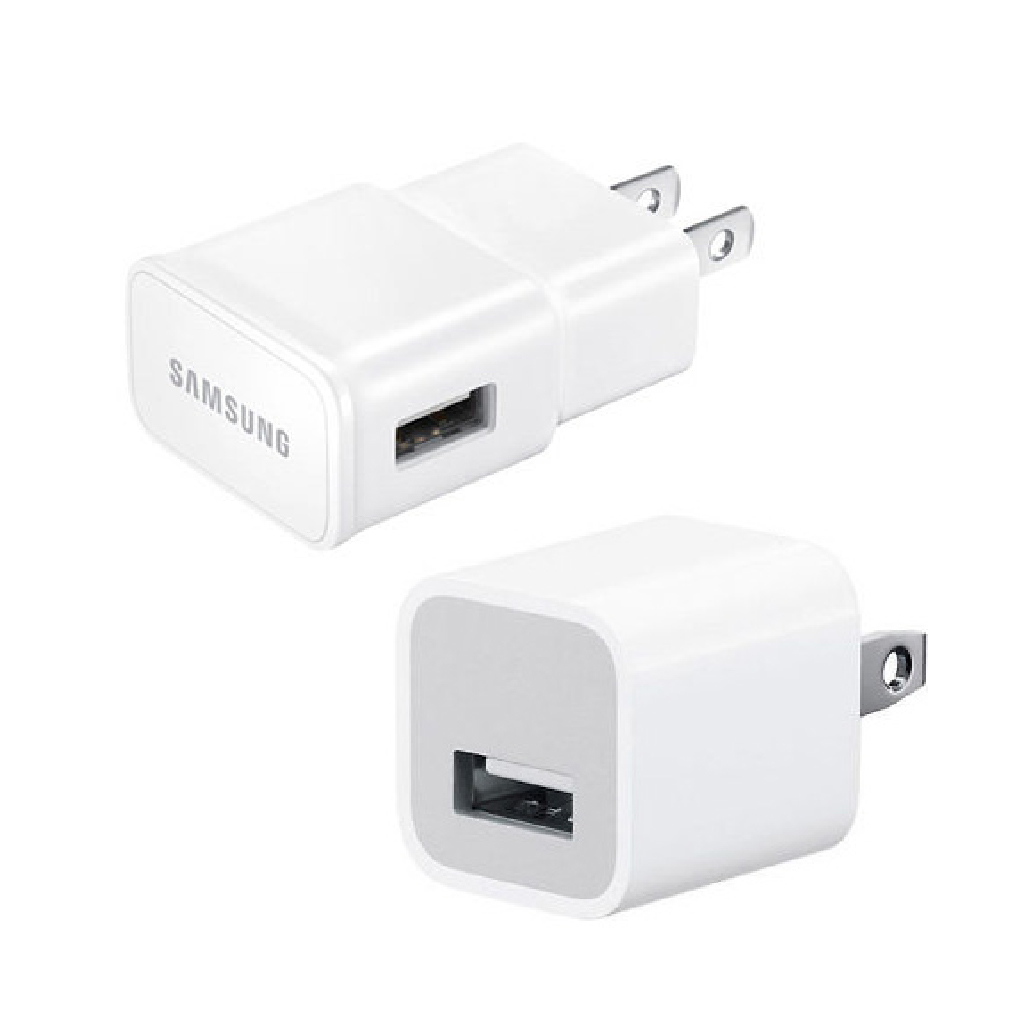
NOT INCLUDED
Wall charging block not included, but you use any standard cellphone charger.
2
CHARGE SENSORS
2. Charge Your Sensors First
1:01
CHARGE SENSORS FIRST
(45-60 MIN)
HOW TO CHARGE YOUR SENSORS
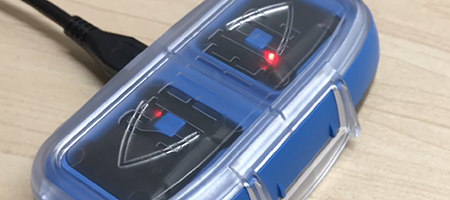
We know you are excited to test those sensors, but please make sure they are fully charged before your connect them for the first time. A full charge takes 45-60 min. The Charging Case & USB cable are included. You can charge to a laptop/desktop computer, or to an outlet using your cellphone charging block.
HOW TO USE THE CHARGING CASE
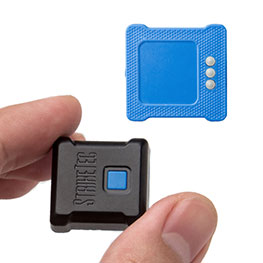
Sensors go in face up. The 3 dots on the bottom need to align with the inside of the charger.
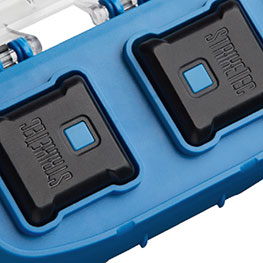
Make sure the sensors are inserted correctly. Blue Power buttons are facing in.
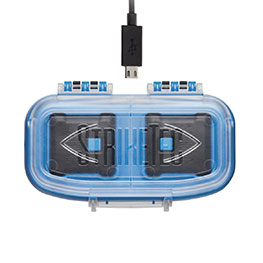
Close the lid properly. The USB cable plugs into the back of the case.
Any standard USB charging block for a cellphone or tablet will work. Charge 45-60 min.
FLASHING RED
While plugged in, the sensors will blink red to show they are actively charging.
SOLID RED
When complete, they will stop blinking, and glow steady red.
3
POWER ON / OFF
3. Power on & off Sensors
0:50
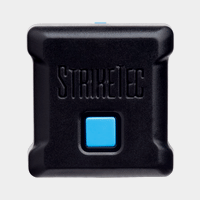
THE BLUE POWER BUTTON
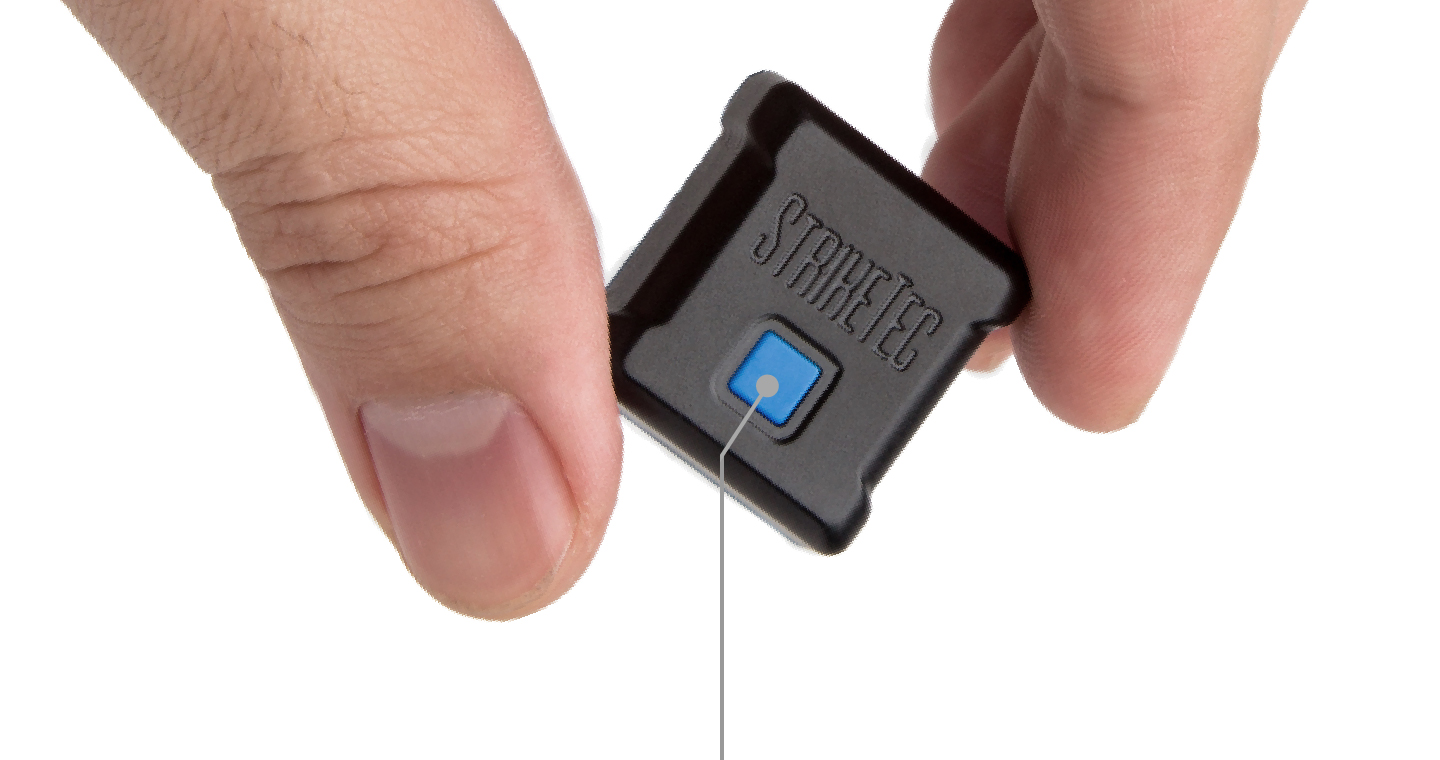
Remember to charge your sensors before the first use. Each sensor has 1 blue power button used for both ON & OFF. There is a different sequence for ONvs OFF. Hint: you may need to press down firmly.
TURNING SENSORS ON

HOLD DOWN FOR 4 SECONDS
1...2...3...4
TURNING SENSORS ON
HOLD DOWN FOR 4 SECONDS1...2...3...4
To turn a sensor on, hold down the blue power button firmly for 4 seconds. Count out 1,2,3,4 so you hold it down long enough. You may need to press hard. When it is on, it will start blinking green. If it doesn’t start, try pressing down a little harder, and a little longer.

TURNING SENSORS OFF
PRESS THREE TIMES IN A ROW CLICK...CLICK...CLICK...WAIT
TURNING SENSORS OFF
PRESS THREE TIMES IN A ROW CLICK...CLICK...CLICK...WAIT
Make sure you turn both sensors off when you are done using them. To turn each sensor off, press the blue power button 3 times, within 2 seconds … click click click. When it turns off, it will blink rapidly 6 times, then stop. If they don’t turn off, try pressing down more firmly, and clicking faster.
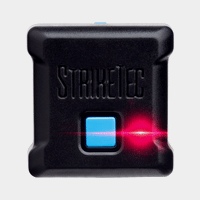
LED INDICATOR LIGHTS: ON VS CONNECTED
Don’t worry, we will get to this later… But here is a quick note on the sensor LED colors.


Green means a sensoris ON and Waiting to Connect with the App.


Blue means a sensoris ON, Connected, & ready to for you to punch.

TROUBLESHOOTING RESET
Sensors are protected from power surges. If there are any sudden voltage changes the sensors will shut off to preserve their components. You must reset the sensor in order to power the sensor back on. To reset them, put both sensors in the charger case, close the lid, and firmly press the blue button on the bottom of the case.

OUTSIDE THE USA
Different countries provide different voltage in basic household electric outlets. If you are outside the USA, we suggest charging via a desktop or laptop to avoid damage from high voltage outlets.
4
DOWNLOAD APP
4. Download the App
DOWNLOAD THE APP FOR FREE


5
ACCOUNT SETUP
5. App Account Setup
SIGN UP W/ FACEBOOK FOR PROFILE PHOTO
All StrikeTec members are given a public profile. If you would like to have a profile photo, you need to create your account using your Facebook login.

-- OR --
WITHOUT FACEBOOK...
If you don’t use Facebook, you may choose an email and new password. Passwords must contain 8-20 characters, at least 1 uppercase, 1 number, and 1 special character.

HINT: tap the eye icon to see your password

BASIC PROFILE QUESTIONS

Must be 13 or older. Age required for ___ Compliance

DETERMINING YOUR LEVEL
Your skill level will help us better categorize your experience in striking. Your performance ranking will be based on specific criteria we expect you to meet with that skill level. It will be beneficial for you to give an accurate assessment of your own skills and we will help you keep track along the way.

DETERMINING YOUR STANCE
The two Stances are as follows:
Traditional – This is typically used by Right hand dominant boxers. Your left foot will be closest to the heavy bag, leaving your most powerful punch (right hand) to have the longest distance to travel and generate power.
Non-Traditional (Southpaw) – Typically used by Left hand dominant boxers. Place your Right foot closest to the heavy bag, leaving your most powerful punch (left hand) to have the longest distance to travel and generate power.

WE NEED YOUR EXACT WEIGHT
Your body weight is very important to track throughout your usage of the app. We suggesting updating your weight as often as you can, but at least 2 times per month.

DON’T HAVE SENSORS YET?
You can still use the app even without sensors. You will have access to the Round Timer in the Training Routines section. This will act as your Bell and Round Timer for your workouts in the gym. You can also view videos and Socialize with your friends. Of course, without sensors you will not be able to receive get performance feedback. You can change this in settings, if you do decide to purchase sensors.
6
CONNECT SENSORS
6. Connect Your Sensors
SENSOR SETUP TUTORIAL
The sensor setup tutorial is available whenever you are ready. We have made it super easy to get set up, by walking you through each step. It is available from the Sensor page, under the Account section on the main menu.

READY TO SET UP SENSORS ?
After creating your free account and signing in, you are asked if you want to set up your sensors immediately. If so, charge them first. You can always explore the app while they are charging.


Before you connect your sensors for the first time...
We know you are excited to test those sensors, but please make sure they are fully charged before you connect them for the first time. A full charge takes 45-60 min. The Charging Case & USB cable are included. You can charge to a computer, or to an outlet using your cellphone charging block.

They connect via your phone’s bluetooth
Your sensors connect to your phone wirelessly via Bluetooth signal. They connect one at a time, so you know which sensor goes on each wrist. Don’t worry… the app will guide you through, one step at a time.

Fully charged? Turn them on.
When your sensors are fully charged, turn them on. Each sensor has 1 blue power button. To turn a sensor on, hold down the blue power button for 4 seconds. You may need to press hard. When it is on, it will start blinking green. If it doesnt start, try pressing down a little harder, and a little longer.

Now your phone will search for any active Bluetooth devices nearby. It might take a few seconds.
Please wait a few seconds between turning them on and searching. Sometimes the phone’s bluetooth doesn’t activate fast enough, and sensors are not found the first time.

We need access to your location
Please allow access to your location. We do not use your actual location, we are required by Google to gain confirmation in order to have your device search and connect to the StrikeTec Sensors.

Searching for new sensors
It may take a few seconds for the search to complete. Hopefully both sensors will be found the first time. If not, just try searching again. Sometimes users click through too quickly and the Bluetooth doesnt have time to activate properly.

Didn’t find both sensors?
If they don’t show up after 2 searches, review the troubleshooting hints on screen to see if you missed a step. When both are found…

2 sensors listed? Great!

Each sensor must be assigned to a hand.
The sensors are identical, other than their internal ID number. We need to assign one as the right hand, and one as the left hand. That is how the app will measure your right vs left-hand punches.

The right hand sensor is connected, and blinking blue.
Look for the sensor with the blue flashing light. This is the sensor we just registered. Attach it to your right wrist, or put it with your right-hand boxing glove.

Now the 2nd sensor should start blinking blue.
After one sensor is registered to the Right hand (primary), the second sensor will be registered as the left. Attach it to your left wrist, or put it with your left glove.
Turn off when done.
If you are not training immediately, turn your sensors off by clicking the blue power button on each sensor 3 times.

WRAPS & GLOVES
Don’t forget, if you are using a punching bag, remember to wrap your hands and wear gloves. Protect your wrists! It is best to wear both traditional boxing hand wraps and high quality boxing gloves over. StrikeTec also sells special gloves with sensor pockets.
POSITIONING ON YOUR WRISTS
If you have already activated and turned on your sensors, remember which one is activated as the right hand. Each sensor should be placed on your wrist about where you would put a watch. The sensors can be inside the hand wraps. Or in gloves with secure pockets. They should be oriented so the blue power button is closest to you, and you can read the “StrikeTec” logo from your perspective.


7
SOCIAL PROFILE
7. Your Social Profile
ALL MEMBERS HAVE A PUBLIC PROFILE
All StrikeTec members have a public profile by default, even spectators without sensors. You can choose whether to show your training data, stats, & achievements to the StrikeTec community. Profile photos are linked from Facebook. (optional)
A BLANK PROFILE FOR A NEW MEMBER
A COMPLETE MEMBER PROFILE

THE MAIN SECTIONS OF THE PROFILE PAGE

PHOTO, NAME AND CONNECTION
When someone views your profile, they will see your First and Last name, or whatever name you listed. They will also see their connection to you: “Follows You” “Following” or “Connection”. Connection means you both follow each other.

SOCIAL NETWORK
When someone views your profile, they will see how many followers you have, how many members you follow, and how many 2-way connections. (Connections can Battle and chat.)

ACHIEVEMENTS
As you earn Achievement Badges, they are added to your profile. 3 are visible. When you tap on “See All,” a long list of all possible badges are displayed. If they haven’t been earned yet, they are dimmed out.

TRAINING STATISTICS
The Statistics area shows a quick summary of your training to date. The Speed & Power numbers are cumulative averages, including all types of training activities.

BATTLE HISTORY
Battles are one-on-one friendly competitions between two members. Your Battle History is listed on your public profile by default, as well as under “Battle A Friend” from the menu.
SOME PROFILE SECTIONS CAN BE KEPT PRIVATE
Whether your just getting started with a blank profile, or you have been training for months, you may want to keep certain parts of your profile private. Tap on the settings icon at the top of your profile page to select which sections will be visible to other StrikeTec members.

PROFILE VISIBILITY OPTIONS

8
APP MENU
8. Tour of the App Menu
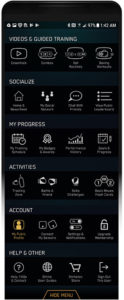
THE MAIN MENU
Press the menu button on the bottom of the screen to browse all of the StrikeTec app features. You can scroll up/down along with left/right on some rows that have more options available.

VIDEOS & GUIDED TRAINING
- Essentials
- Combos
- Set Routines
- Boxing Workouts
- Data Science
SOCIALIZE
- Home & News Feed
- My Social Network
- Chat With Friends
- View Public Leaderboard
MY PROGRESS
- My Training Schedule
- My Badges & Awards
- Performance History
- Goals & Progress
ACTIVITIES
- Training Zones
- Battle A Friend
- Skills Challenges
- Basic Moves Flash Cards
ACCOUNT
- My Public Profile
- Connect My Sensors
- Settings & Notifications
- Upgrade Membership
HELP & OTHER
- Help, FAQs & Contact
- Online User Guides
- StrikeTec Store
- Sign Out This User